
ARTICLES AND PUBLICATIONS
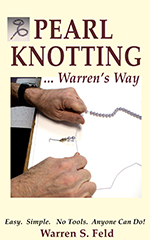
PEARL KNOTTING...Warren's Way, (2nd Edition)
Easy. Simple. No Tools. Anyone Can Do!
188pp, many images and diagrams
Kindle or
Ebook or Print
Classic Elegance! Timeless! Architectural Perfection!
Learn a simple Pearl Knotting technique anyone can do.
No special tools. Beautiful. Durable. Wearable.
PEARL KNOTTING Doesn’t Need To Be Hard
In this very detailed book, with thoroughly-explained instructions and pictures, you are taught a non-traditional Pearl Knotting technique which is very easy for anyone to learn and do. Does not use special tools. Goes slowly step-by-step. Presents a simple way to tie knots and position the knots to securely abut the bead. Anticipates both appeal and functionality. Shows clearly how to attach your clasp and finish off your cords. And achieves that timeless, architectural perfection we want in our pearl knotted pieces.
Most traditional techniques are very frustrating. These can get overly complicated and awkward. They rely on tools for making and positioning the knots. When attempting to follow traditional techniques, people often find they cannot tie the knots, make good knots, get the knots close enough to the beads, nor centered between them. How to attach the piece to the clasp gets simplified or glossed over.
Fortunately, Pearl Knotting doesn’t need to be this hard.
Pearl Knotting…Warren’s Way teaches you how to:
• Hand-knot without tools
• Select stringing materials
• Begin and finish pieces by
(1) attaching directly to the clasp,
(2) using French wire bullion,
(3), using clam shell bead tips, or,
(4) making a continuous piece without a clasp
• Add cord
• Buy pearls, care for them, string and restring them, store them
By the end of this book, you will have mastered hand-knotting pearls.
The Debates
We set up a jewelry design educational program in 2000. A pearl knotting class was part of that curriculum. From the start, we felt that the traditional pearl knotting technique was too difficult for most students to learn. We explored ways of adapting it. But it was a long road until we figured out a better way. That was in 2014.
Along the way, I had three different pearl knotting instructors. Each had their own adaptive version. And each was a disappointment. Their students could not get their knots close enough to the beads. Even each instructor had difficulty with getting consistently well-tied and well-positioned knots. In 2014, I convened a meeting with two of the instructors and myself. For two hours, they argued with each other about which strategies and steps were best. Which bead cord to use. How to tie a knot. How to get the knot tied closely abutting the bead. Whether to take one cord through the bead or two. Which knots to glue. What glue to use. Where to tie the final knot. Whether to use French wire bullion or clam-shell bead tips or attach the cord directly to the clasp. There was no meeting of the minds. No compromising. No give and take. I cut the meeting short.
I had to figure this out myself. I did some research in books, magazines and online. I found 14 significantly different approaches. I implemented them all and took notes about what I liked and what I didn’t like.
I developed some criteria for evaluation, based on my understanding of both aesthetic as well as architectural goals. Simple, the finished pieces had to look good, function well, and be secure over time.
There were three core problems that had to be resolved:
(1) Pearl holes are very sharp and can easily shred the stringing material. The technique had to minimize the movement of the pearl up and down between knots, as well as the rotation around the cord.
(2) Glued knots, incorrectly sized knots, and off-centered knots minimize the ability of the knots to adequately respond to stresses and strains on the piece when worn.
(3) Starting and ending a piece – that is attaching to either side of the clasp assembly – is not as straightforward and without complications that you might think. You do not want the clasp assembly to be insecure, look ugly, or compete visually with the pearl knotted piece itself.
The resulting technique and approach which is detailed in this book is what I came up with – Warren’s Way. I chose a technique which does not use tools because I found tools get in the way of tying good and well-positioned knots. I decided to bring two cords through the bead to minimize any negative effects resulting from the pearl rotating around the cord. I only have you glue one knot in the piece. I use a simple overhand knot which is easily centered. I developed a rule for choosing the thickness of your bead cord. I lay out different steps for starting and ending a piece, based on how you want to attach the piece to your clasp assembly.
There are four very simple variations:
(a) attaching bead cord directly to the clasp,
(b) using French wire bullion,
(c) using clam-shell bead tips, and
(d) making a continuous piece without a clasp assembly. Each variation has pros and cons. The steps for hand-knotting between beads is the same, no matter the variation.
I also go through the steps on adding cord to your piece-in-progress.
TABLE OF CONTENTS
1. PEARL KNOTTING IS FOR YOU: An Introduction
2. MATERIALS, TOOLS AND YOUR WORK SPACE
3. ALL ABOUT PEARLS
4. ALL ABOUT HAND-KNOTTING PEARLS
5. DESIGN CONSIDERATIONS
6. MEASUREMENTS
7. SELECTING AND TESTING BEAD CORD
8a. VARIATION #1: ATTACHING DIRECTLY TO THE CLASP
8b. VARIATION #2: USING FRENCH WIRE BULLION
8c. VARIATION #3: USING CLAM SHELL BEAD TIPS
8d. VARIATION #4: CONTINUOUS PIECE WITHOUT CLASP
8e. A NOTE ABOUT ADDING MORE CORD
9. HANDLING CONTINGENCIES
10. FINISHING TOUCHES
