
ARTICLES AND PUBLICATIONS
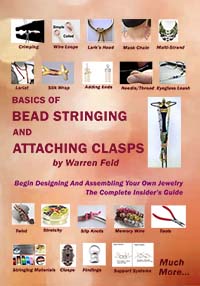
BASICS OF BEAD STRINGING AND ATTACHING CLASPS:
Design And Assemble Your Own Jewelry,
The Complete Insider’s Guide
452pp, many images and diagrams
Kindle or
Ebook or Print
Learning Bead Stringing Is More Than Putting Beads On A String And Tying On A Clasp
There is an art and skill to stringing beads. First, of course, is the selection of beads for a design, and the selection of the appropriate stringing material. Then is the selection of a clasp or closure, appropriate to the design and use of the piece.
You want your pieces to be appealing. You want them to wear well. You want someone to wear them or buy them. This means understanding the basic techniques, not only in terms of craft and art, but also with considerations about architecture, mechanics, and some sociology, anthropology and psychology.
In this book, I go into depth about:
1. Choosing stringing materials, and the pros and cons of each type
2. Choosing clasps, and the pros and cons of different clasps
3. All about the different jewelry findings and how you use them
4. Architectural considerations and how to build these into your pieces
5. How better designers use cable wires and crimp, as well as, use needle and thread to string beads
6. How best to make stretchy bracelets
7. How to make adjustable slip knots, coiled wire loops, and silk wraps
8. How to finish off the ends of thicker cords or ropes, so that you can attach a clasp
9. How to construct such projects as eyeglass leashes, mask chains, lariats, multi-strand pieces, twist multi-strand pieces, and memory wire bracelets
10. How different teaching paradigms – craft vs. art vs. design – might influence the types of choices you make
Get Started With Bead Stringing
Most people start their jewelry making careers by stringing beads. I am no exception. I began stringing beads in the late 1980s. I have to admit, I was clueless. I didn’t know what stringing material to choose. The prevalent material at that time was either fishing line or dental floss. Also strung things on leather cord. I didn’t know what clasp to use. I primarily used lobster claws. Sometimes barrel clasps. About the only thing I knew about beads was that I had to coordinate the size of the hole with the thickness of the stringing material I was using. Did not fully understand how to attach a clasp to the stringing material I was using.
Needless to say, for the first 3 years of my jewelry making career, most things I made broke.
After that third year, I began taking in repairs. I got to see how other people made things, what broke, where they broke, and under what circumstances they broke. This was my education. I began formulating ideas about good stringing and bad stringing. I tested these ideas out.
As I became more and more familiar with materials and techniques, I began to teach bead stringing in 1998. A shout-out to all my students since then. They have challenged me. Enlightened me. Encouraged me. I could not have written this book without each and every one of them.
My partner Jayden always pushed my limits. Experimenting with new materials. Practicing new techniques. Merging techniques within the same piece. I am forever grateful. She launched my career. I would have never found jewelry design without her.
As you learn and practice the techniques in this book, try to be as reflective and what is called metacognitive of all the design, manipulation and construction choices you make with each piece. Pay critical attention to how you approached unfamiliar or problematic situations. Carefully develop your Designer Tool Box of fix-it strategies. These will carry you a long way, empowering you as a bead stringer and jewelry designer.
TABLE OF CONTENTS I found out about you through a google search that then led me to buy your book “The Basics of Bead Stringing and Attaching Clasps”. I LOVE your book and how you instruct. The way you instruct in the book matches up with the way I learn WONDERFULLY. I can’t say that about most books I have picked up so it was so refreshing to have found it.
ACKNOWLEDGEMENTS
1. INTRODUCTION
2. MATERIALS AND TOOLS
3. WORKSPACE
4. THREE TEACHING APPROACHES
5. THE DESIGN PROCESS
6. CHOOSING CLASPS
7. CHOOSING STRINGING MATERIALS
8. TWO COGNITIVE PHENOMENA
9. TYPES OF CLASPS
10. TYPES OF STRINGING MATERIALS
11. JEWELRY FINDINGS
12. HOW TO CRIMP
13. STRINGING WITH NEEDLE AND THREAD
14. ELASTIC STRING AND STRETCHY BRACELETS
15. MAKING SIMPLE AND COILED WIRE LOOPS
16. ATTACHING END PIECES TO THICKER CORDS
17. MAKING SIMPLE AND FANCY ADJUSTABLE SLIP KNOTS
18. SILK WRAP
19. EYEGLASS LEASH AND MASK CHAIN
20. LARIAT
21. MULTI-STRAND PIECES
22. TWIST MULTI-STRAND PIECES
23. MEMORY WIRE
24. FINAL WORDS OF ADVICE
WHAT MY READERS HAVE TO SAY...
-- Amy
